💳 MiixKey Smart Card
📌 Note
📱 MiixKey Menu Explanation
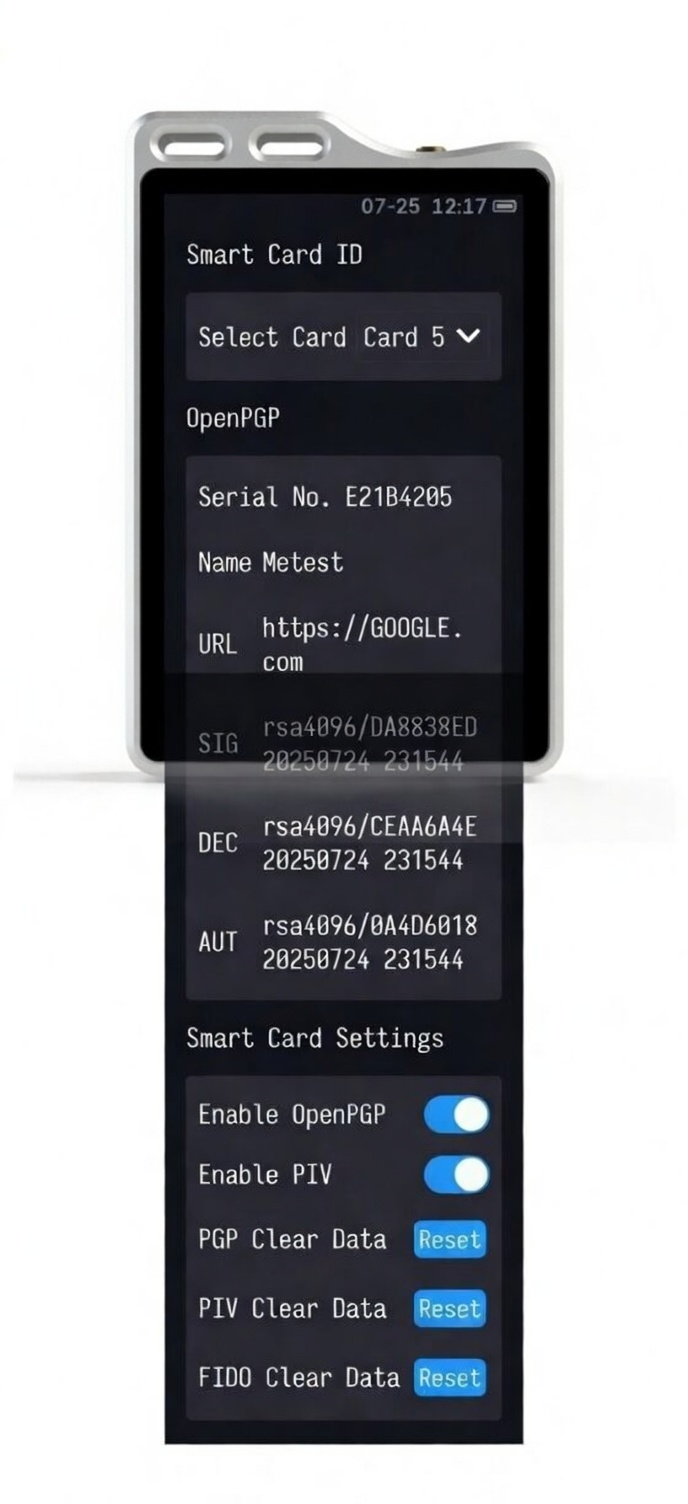
Select Card
- There are five cards that can be switched.
- Each card contains independent OpenPGP, PIV, and FIDO.
- You can reselect the card number to reconnect.
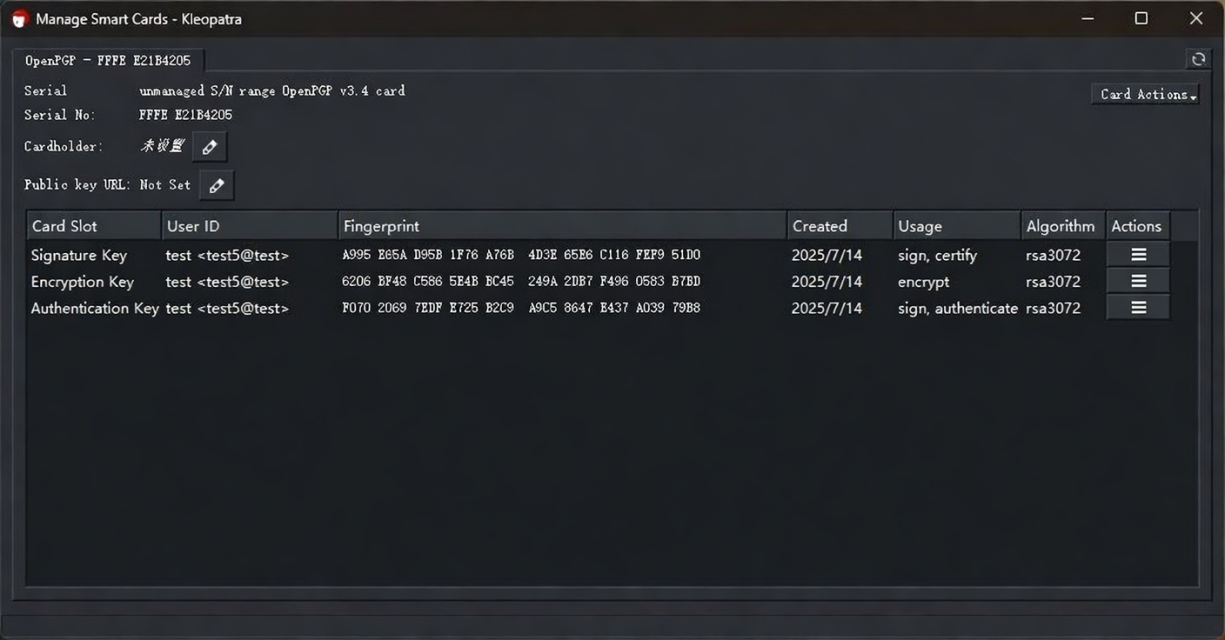
OpenPGP Card Information
Displays relevant information.
Smart Card Settings
- Enable OpenPGP
Experimental feature. When disabled, OpenPGP related functions are not provided. - Enable PIV
Experimental feature. When disabled, PIV related functions are not provided. - NDEF Write Protection
When enabled, the content of NDEF tags cannot be modified. - PGP Clear Data
Clears the PGP data of the current card number. - PIV Clear Data
Clears the PIV data of the current card number. - FIDO Clear Data
Clears the FIDO data of the current card number. - NDEF Clear Data
Clears the NDEF data of the current card number.
FIDO
- Resident Keys: 64
- FIDO supports use via USB and NFC. For Android phones, it is recommended to use with the Authnkey app.
🔑 OpenPGP
Note
- Default Admin PIN:
12345678 - Default PIN:
123456
Supported Algorithms
- RSA2048
- RSA3072
- RSA4096
- X25519
- Ed25519
- NIST P-256 (secp256r1, prime256v1)
- NIST P-384 (secp384r1)
- secp256k1
All algorithms support on-card generation.
Installation and Configuration
Windows System
- Download and install Gpg4win (the full bundle including Kleopatra, GpgEX, and GnuPG).
Official download: https://gpg4win.org/download.html
Recommended: Choose the latest stable version (includes GnuPG ≥ 2.4.x for best smart card support). - After installation, open Kleopatra (or run
gpg --versionin cmd/PowerShell to verify). - Insert your smart card device.
- Run the following in Command Prompt or PowerShell to detect and configure the card:
Linux System
- Install necessary software:
sudo apt update sudo apt install gnupg2 gnupg-agent scdaemon pcscd - Configure device identification information:
Two methods, choose one. It is recommended to use the udev rule.Method 1: Add udev rule
- Create the rule file:
sudo nano /etc/udev/rules.d/98-MiixKey.rules - Paste the rule:
# MiixKey ACTION=="add", SUBSYSTEMS=="usb", ATTRS{idVendor}=="303a", ATTRS{idProduct}=="0030", GROUP="plugdev", MODE="0660" - Reload the rules:
sudo udevadm control --reload-rules
sudo udevadm trigger
Method 2: Modify the libccid_Info.plist file
- Modify libccid_Info.plist:
sudo sed -i -e '/<key>ifdVendorID<\/key>/{n;a \ \t\t<string>0x303A<\/string>'"'"'\n''}' /etc/libccid_Info.plist; sudo sed -i -e '/<key>ifdProductID<\/key>/{n;a \ \t\t<string>0x0030<\/string>'"'"'\n''}' /etc/libccid_Info.plist; sudo sed -i -e '/<key>ifdFriendlyName<\/key>/{n;a \ \t\t<string>MiixKey<\/string>'"'"'\n''}' /etc/libccid_Info.plist - Configure scdaemon:
echo "disable-ccid" >> ~/.gnupg/scdaemon.conf
- Create the rule file:
Smart Card Operation Guide
Note
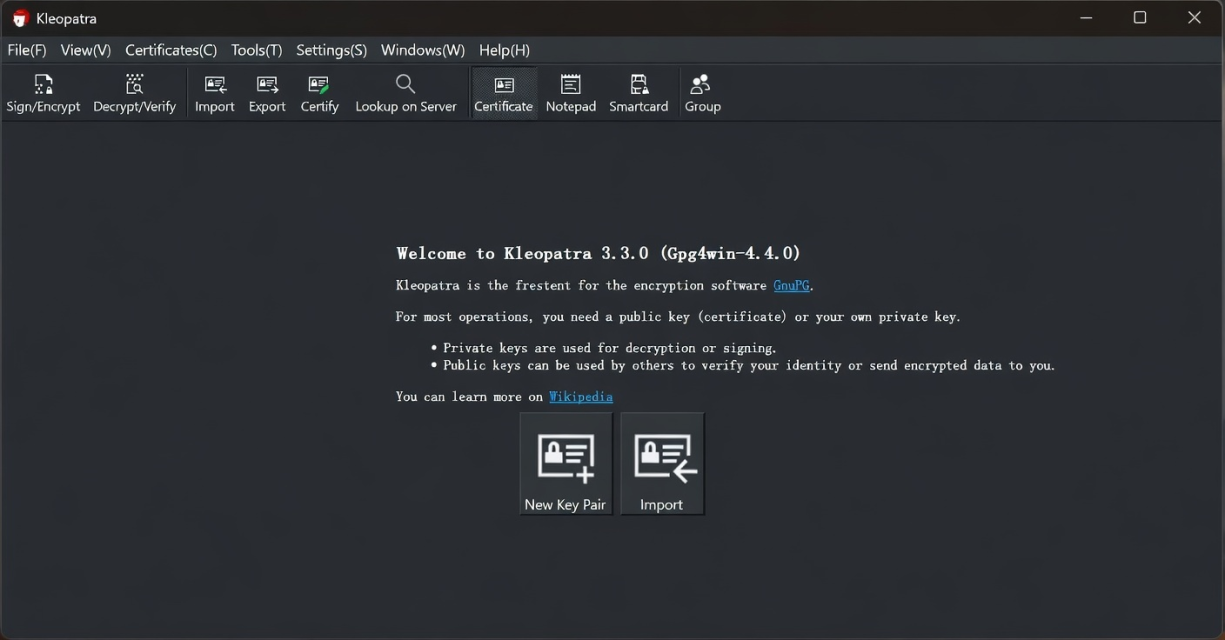
On Windows, you can use the command line or a graphical interface. For the graphical interface, please refer to Kleopatra Graphical Interface.
On Windows, Kleopatra is included in Gpg4win, no separate installation is needed.
Creating Certificates
Common Command Operations
- Check Smart Card Status
gpg --card-statusCorrect Output example:Reader .................: MiixKey [MiixKey] (000000) 00 00 Application ID ........: D276000124010304FFFE30EDA0010000 Application type ......: OpenPGP Version ................: 3.4 Manufacturer ...........: unmanaged S/N range Serial number ..........: 30EDA001 Name of cardholder ....: [not set] Language prefs ........: [not set] Salutation .............: URL of public key ......: [not set] Login data .............: [not set] Signature PIN ..........: forced Key attributes .........: rsa2048 rsa2048 rsa2048 Max. PIN lengths ......: 64 64 64 PIN retry counter ......: 3 0 3 Signature counter ......: 0 UIF setting ............: Sign=off Decrypt=off Auth=off Signature key ..........: [none] Encryption key .........: [none] Authentication key .....: [none] General key info .......: [none] - Enter Smart Card Edit Mode
gpg --edit-card - Generate Key Pair (Admin Operation)
gpg/card> admin    # Enter admin mode
gpg/card> generate
Follow the prompts:
- Make off-card backup? → Recommended to choose
n(do not create backup) - Key validity period → Press Enter directly (valid forever)
- Enter user information:
- Real name: Enter your name (e.g., Metoo)
- Email address: Enter your email (e.g., test@test)
- Confirm information → Enter
oto confirm
- Make off-card backup? → Recommended to choose
- Enable User Interaction Flags (UIF)
gpg/card> uif 1 on # Enable signature confirmation gpg/card> uif 2 on # Enable decryption confirmation gpg/card> uif 3 on # Enable authentication confirmation - Change PIN (Important!)
gpg/card> passwd⚠️ Important: Default PIN:123456
Default Admin PIN:12345678
It is strongly recommended to change them on first use. - Exit Smart Card Edit
gpg/card> q
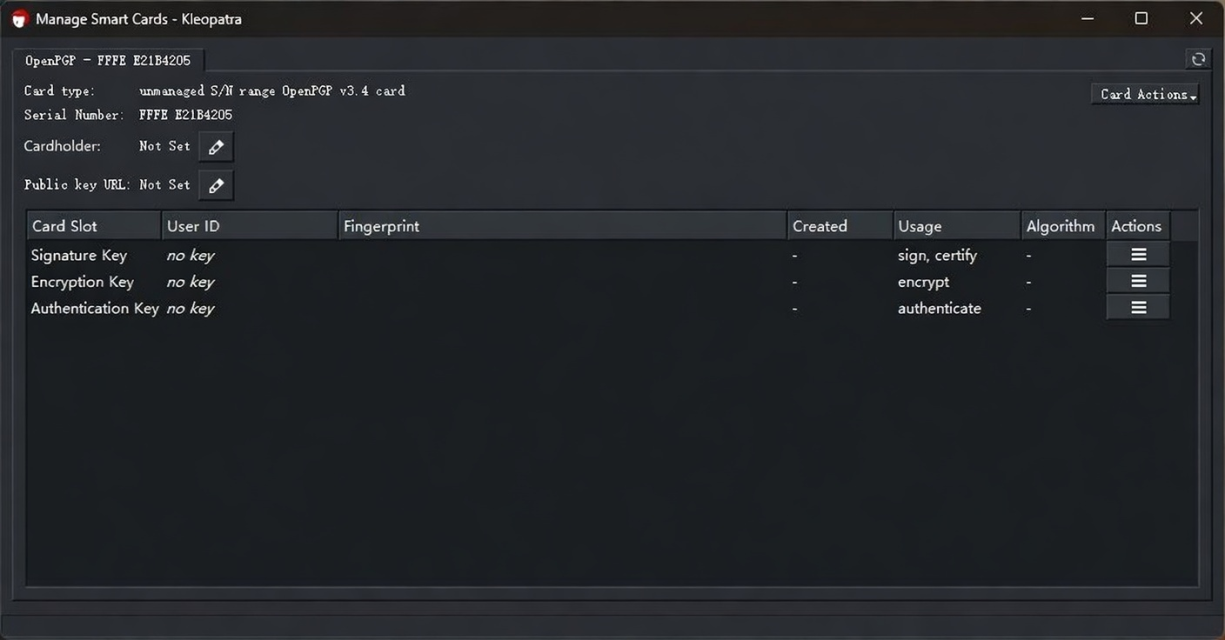
Kleopatra Graphical Interface
Open the software and click on Smart Card.
Click Card Actions in the upper right corner and select Generate New Key.
Fill in the information as needed, choose whether to back up, then click OK.
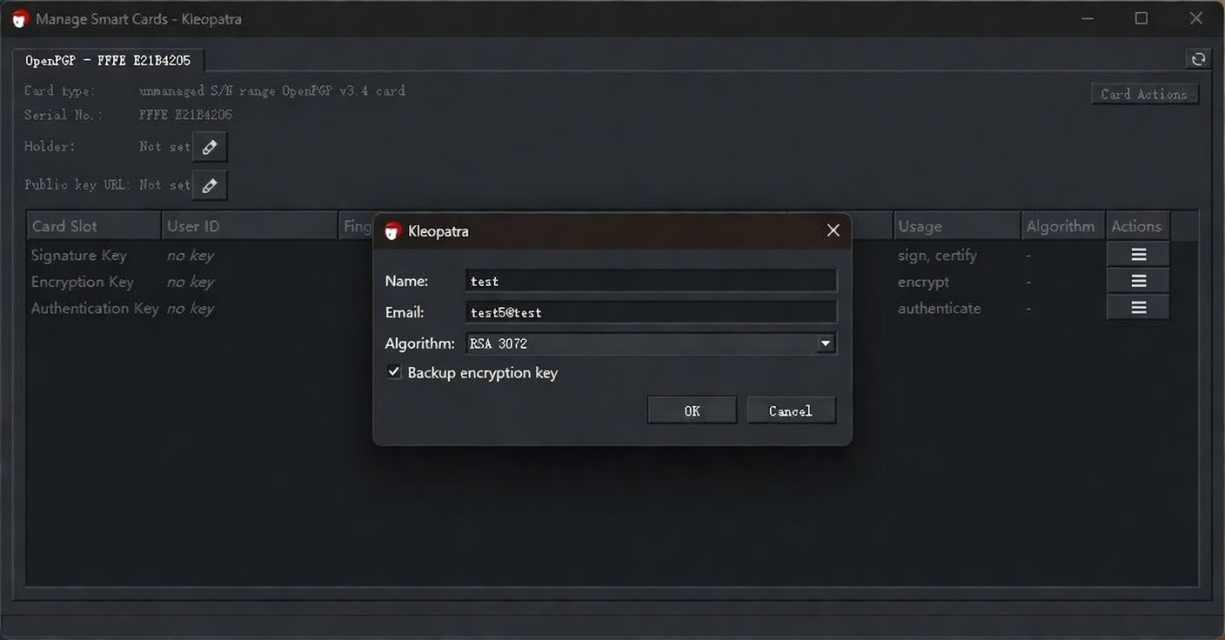
During the process, you will be prompted to enter the Admin PIN and PIN several times. Please note the distinction. The default Admin PIN is 12345678, and the default PIN is 123456.
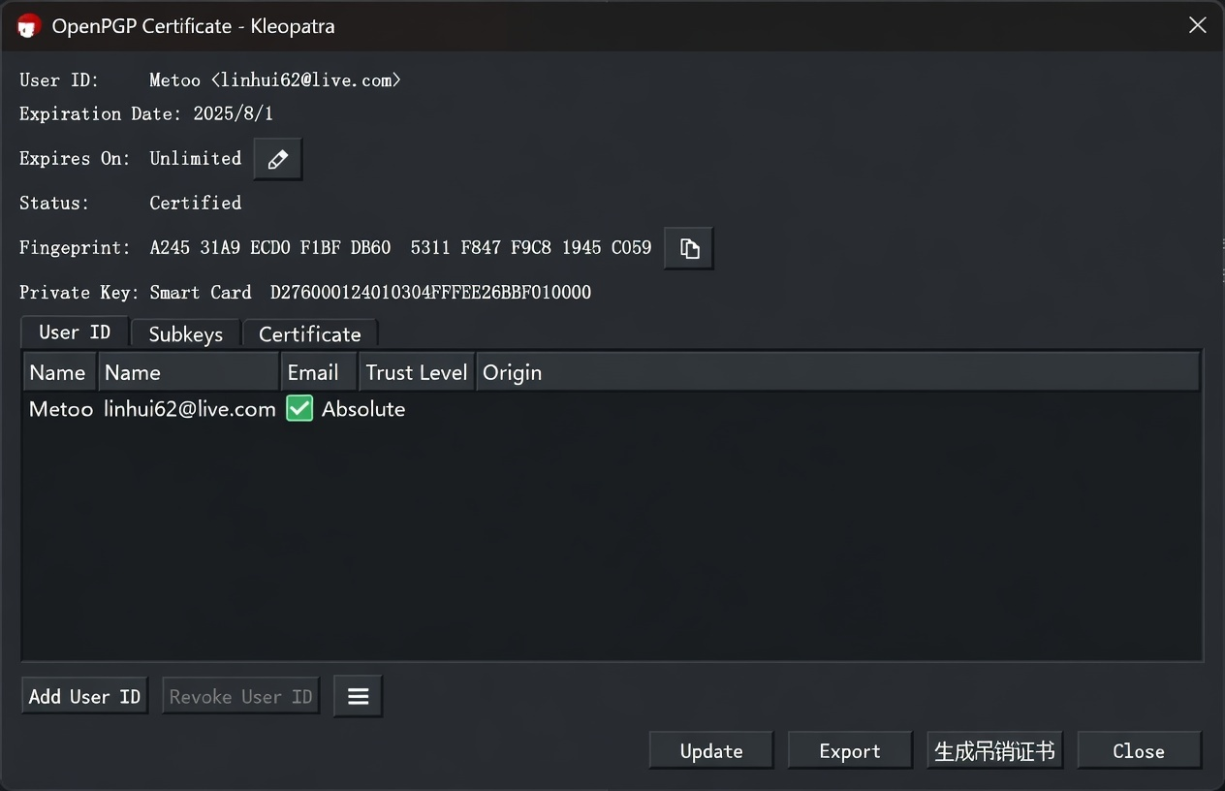
Completion is as shown above.
Creating a Revocation Certificate
Common Command Operations
- Check the key fingerprint:
gpg -k - Generate a revocation certificate:
gpg --output revoke_cert.asc --gen-revoke YOUR_KEY_ID
Kleopatra Graphical Interface
After opening the software, double-click the certificate in the certificate interface, and click Generate Revocation Certificate in the lower right corner.
Uploading Certificate to Server
Common Command Operations
- Check the key fingerprint:
gpg -k - Upload to server:
gpg --keyserver hkps://keyserver.ubuntu.com --send-keys YOUR_KEY_ID
Kleopatra Graphical Interface
After opening the software, right-click the certificate in the certificate interface and select Publish on Server.
Get Public Key Certificate Link
Append your certificate fingerprint to the end of this URL:
https://keyserver.ubuntu.com/pks/lookup?op=get&search=0xPrecautions
- Security First: Change the default PIN immediately after first use.
- Physical Confirmation: After enabling UIF, touch confirmation is required when using smart card functions.
- Key Validity Period: For production environments, it is recommended to set a validity period (e.g.,
1y= 1 year). - If you encounter device recognition issues, on Windows, try switching cards in the Smart Card menu. On Linux, try restarting the PC/SC service:
sudo service pcscd restart
🔐 PIV
Defaults
- PIN:
123456 - PUK:
12345678 - Management Key:
010203040506070801020304050607080102030405060708
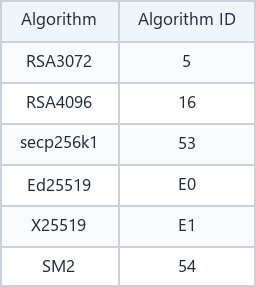
Supported Algorithms
Supported Slots
- 9A: PIV Authentication
- 9E: Card Authentication
- 9C: Digital Signature
- 9D: Key Management
- 82, 83
Install yubico-piv-tool.
Using PIV for SSH via PKCS #11
Reference link: SSH with PIV and PKCS11
- Import or generate a key in slot 9a (any slot works) (choose one):
Import:
Generate:yubico-piv-tool -r MiixKey -s 9a -a import-key -i key.pemyubico-piv-tool -r MiixKey -s 9a -a generate -o public.pem - Create a self-signed certificate for this key. The only purpose of the X.509 certificate is to satisfy the requirements of the PIV/PKCS #11 library. It needs to be able to extract the public key from the smart card, and it does this via the X.509 certificate.
yubico-piv-tool -r MiixKey -a verify-pin -a selfsign-certificate -s 9a -S "/CN=SSH key/" -i public.pem -o cert.pemNote: The default PIV PIN is
123456. - Load the certificate.
yubico-piv-tool -r MiixKey -a import-certificate -s 9a -i cert.pem - Find out where ykcs11 is installed.
- Debian-based systems:
/usr/local/lib/libykcs11.so - macOS:
/usr/local/lib/libykcs11.dylib - Windows:
C:\Program Files\Yubico\Yubico PIV Tool\bin\libykcs11.dll
- Debian-based systems:
- Export the public key in the correct format and add it to the authorized_keys file on the target system.
ssh-keygen -D "C:\Program Files\Yubico\Yubico PIV Tool\bin\libykcs11.dll" -eThis command will export all keys stored on the YubiKey. The slot order should remain constant, so you can identify the public key associated with your target private key.
- Authenticate to the target system using the new key.
ssh -I "C:\Program Files\Yubico\Yubico PIV Tool\bin\libykcs11.dll" user@remote.example.com - (Optional) You can also set it up to work with ssh-agent:
ssh-add -s "C:\Program Files\Yubico\Yubico PIV Tool\bin\libykcs11.dll"If this step reports an error, please refer to issues/527.
Confirm that ssh-agent has found the correct key and obtained the public key in the correct format by running:
ssh-add -L